Photo by Dan LeFebvre on Unsplash
Setting up a terminal you will love to use
The terminal is easily the most powerful tool at your disposal in your desktop environment. So learning to use the terminal and setting it up to fit your workflow will give you a huge productivity boost.
In this post, I'll walk you through how I set up my Linux terminal workflow with very little effort and how you can do the same. When we're finished, you will have a cool looking, productivity improving terminal that you will love to use everyday.
Most of what we do here, is also possible on Windows with WSL and MacOS. I use Ubuntu but most of the commands can be executed in any OS. The only differences in commands will be for installing the different tools and utilities we'll need.
Let's get started.
Terminal Emulator
The terminal emulator we're going to be using is called Tabby. It's cross platform and has a rich set of features.
To install Tabby, download the executable for your OS of choice from their releases page and install it.
Once installed, open it and we'll start installing the tools we need.
Shell
My shell of choice is Zsh. The reason I'm using zsh is because we need it to install a framework called Oh My Zsh on top of zsh. Oh My Zsh enhances the default zsh with plenty of helpful functions, plugins and themes.
Using Oh My Zsh, we'll not only make our terminal look much better than the default one, but we'll also add useful functionality.
On most Linux distros, zsh is usually available in the native package manager. On Debian/Ubuntu based distros we can install zsh using this command:
sudo apt install zsh
If you opted for Ubuntu in WSL, you can use the above command to install zsh on Windows.
On MacOS, use Homebrew to install zsh.
brew install zsh
Once installed we can change the default shell to zsh:
chsh -s $(which zsh)
If you're running this command as a non-root user, you'll have to use sudo privileges to change your default shell.
On Windows, you can run exec zsh to switch your shell to zsh.
Now that we have zsh installed, we can now install Oh My Zsh:
sh -c "$(curl -fsSL https://raw.github.com/ohmyzsh/ohmyzsh/master/tools/install.sh)"
Note: You need curl to run this command. It is most probably pre-installed in your OS but if it's not you'll have to install it. You'll also need to have git installed.
Oh My Zsh
Configuring Oh My Zsh is pretty easy using the .zshrc configuration file. Here you can set the terminal theme and enable plugins that you want to use. There are so many choices for themes and plugins.
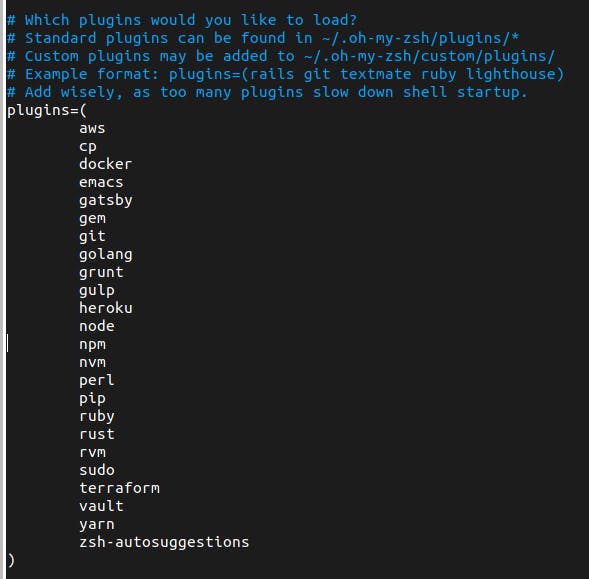
Once you've chosen the plugin(s) you want to use, you can add them to the plugins list in .zshrc. These are the plugins I use.

We'll also install a 3rd-party plugin called zsh-autosuggestions. This will give us autocomplete in our terminal.
To change the terminal theme, replace "robbyrussell" with the theme of your choice. Note that some themes like "agnoster", require Powerline fonts to be installed in your system. Even if you're not using a theme that requires Powerline fonts, let's install it anyway because we'll need it later.
You could stop customizing your terminal right here and you'll have a good looking terminal. But let's make it cooler with Starship.
Starship
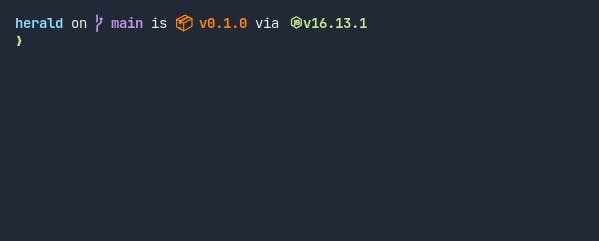
Starship gives us some nice goodies for our shell prompt like git detection and metrics, language and package version detection, time taken to execute a command and more. For example, here's how my prompt looks when I switch to a Next.js project. Note that Starship can detect that my package is public and shows the version!

Starship is also comes with a configuration file that you can use to modify what symbols you want to show for all the languages and tools that it supports. And it's a long list too. The only prerequisite for Starship is that you've installed a Nerd font. If you've installed Powerline fonts in the previous step, you're set.
To install Starship, run this command:
sh -c "$(curl -fsSL https://starship.rs/install.sh)"
If you're on MacOS, you can also use Homebrew to install Starship.
brew install starship
Once it's installed, add this line to your .zshrc file:
eval "$(starship init zsh)"
Close and open your terminal or run
source .zshrc
to apply the changes. Now let's get back to our terminal and setup the panes.
Terminal Multiplexer
If you're like me, you probably need more than one terminal. At the least, we usually need two — one for running a local server and another for git commands. Most terminals come with a tab feature that you can use for using multiple terminals in the same window.
While this may work for some, I wanted a better way. That better way is called a terminal multiplexer. It lets us create multiple terminal panes in the same window. I used to use Tmux, a popular terminal multiplexer. But out terminal emulator of choice comes with a multiplexer built-in.
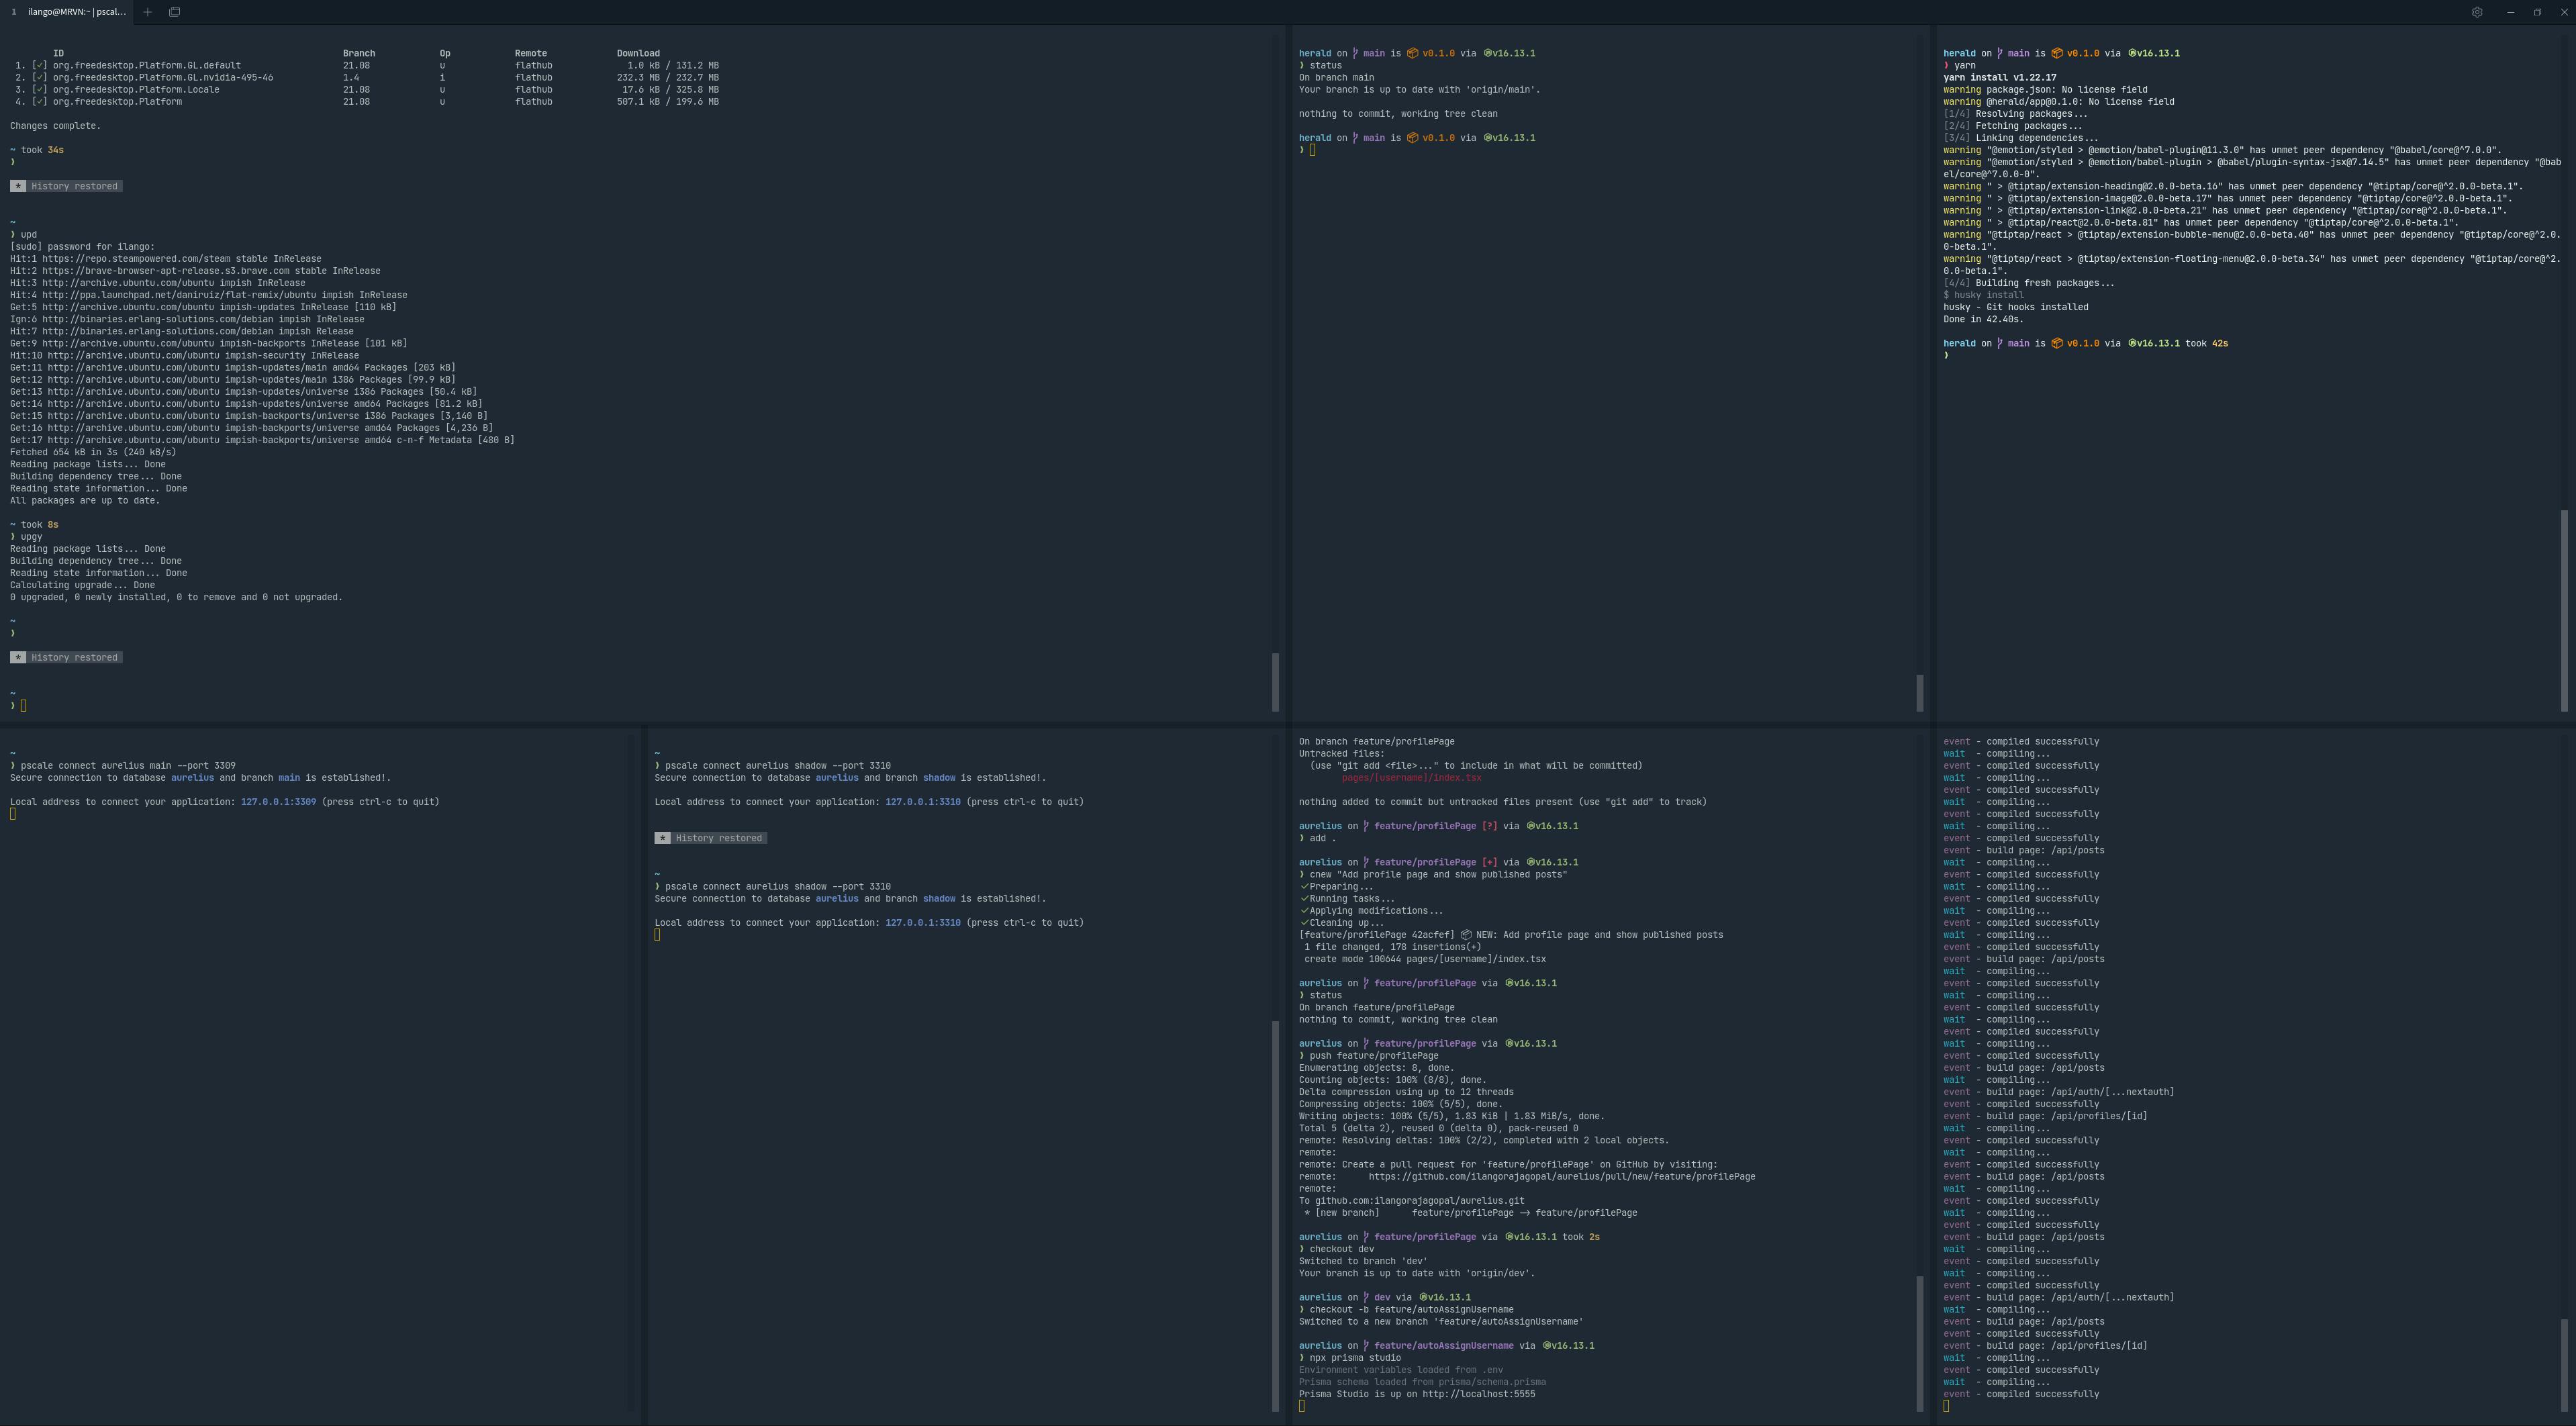
All you have to do to create panes is right click inside the terminal, choose split and select which direction you want to create a new split. For instance, here's how I've split my terminal window.

It may look like overkill but I find it very convenient. Here's why I have so many terminal panes. I have two panes (git commands and local server) each for two of the projects that I'm actively working on. I have one big pane for running OS level commands like updates, editing configuration files etc. Then I have two panes that I use for running local database prompts or for connecting to Planetscale branches.
Another feature of Tabby that I like, is that it restores your previous session automatically when I open it in the morning. I'm still not fully familiar with Tabby's features yet so I'm sure there's more to discover. For example, one feature that I haven't used yet is the SSH profiles and key management features.
This is the terminal setup I'm currently running and it's been fun using it. Before this setup, to get started with the terminal every morning, I have to execute a couple of commands first. Tabby along with the other tools make it that much easier for me to do my work.
I hope this post was helpful. If you have questions about any of these tools or need help configuring them, let me know. I'm glad to help you out.
Do you use a terminal for work everyday? Do you have a different setup that works for you? I'd love to know about it.
