Forget git stash and use git worktrees instead

Here's a typical workflow in the life of a software engineer.
You're about to start working on a feature. You create a branch off of dev or main and then you're off coding. While you're working on the feature, you're notified of a bug in production. Or your pull request has some feedback and you gotta implement those.
But you don't want to lose all the changes you made in your feature branch. Git lets us checkout only one branch at a time. So you do this:
git stash --u
You check out your PR branch or create a branch for the hotfix. You do the necessary work, commit, push, and you're happy. Now you gotta go back to your feature. So you check out your feature branch and run this:
git stash pop
This is usually fine when your project has a simple setup. Sometimes, you have new dependencies you have to install when switching branches. Or you have to run a build.
In fast-moving projects, you probably have more than one pull request open that's under review. So you're in a vicious cycle of stashing changes and popping them back.
Let me tell you about a better way to handle these situations.
Meet git worktrees.
Git worktree is a feature that lets you check out more than one branch at a time. This lets you maintain different branches of work at the same time, and they all happily coexist without you having to stash and pop anything. So how does it work?
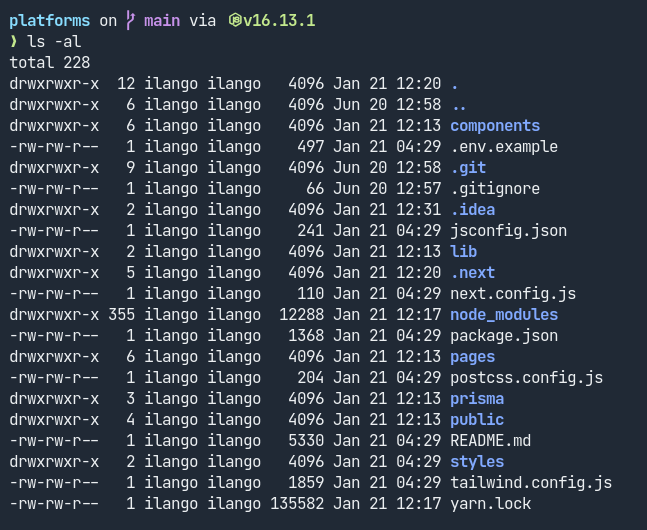
Let's say I have a repository called platforms. It's a Next.js project and here are the files in it.
You create a worktree from an existing repository by using this command:
git worktree add <path>
For example, let's say you want to create a new worktree for feature-1.
git worktree add ../feature-1
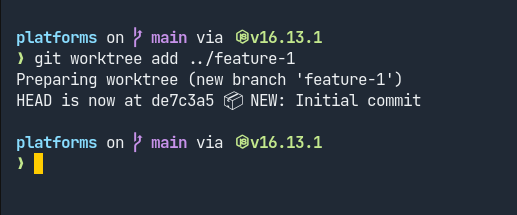
This creates a new branch in your git repository and checks it out at the path ../feature-1. This means there will be a new directory called feature-1 alongside your repository's root directory.
If we cd into feature-1 directory, we see this:
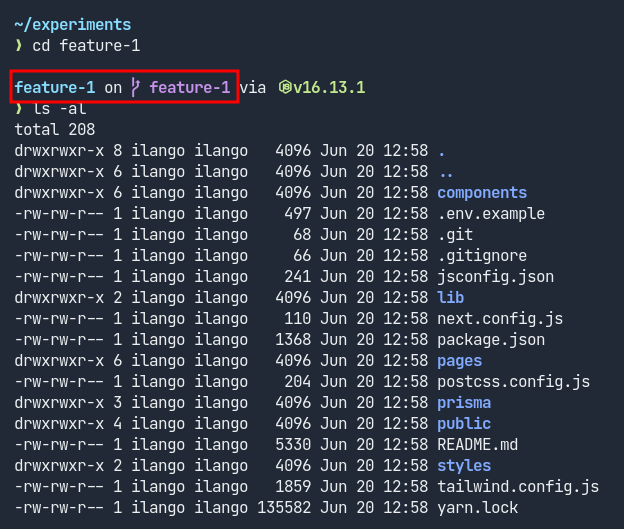
Note that if you want to cd into your worktree, you have to go one level up from your repo root.
Git has created a directory called feature-1, created a new branch called feature-1, and checked out to it. What if you want to create a worktree from an existing branch? Here's how you do that:
git worktree add <path> <branch>
Note that if you don't specify a branch, git will create a new branch for you. If you want to create a worktree from an existing branch, you have to specify it explicitly. On a related note, you can have different worktree and branch names.
In our existing repo, let's create a new branch called hotfix (I'm creating this branch as an example. You can use any existing branch in your repo that you want to create a worktree out of). To create a worktree from this branch, we can run:
git worktree add ../hotfix hotfix
Git will now create a hotfix directory, and checkout to hotfix branch in the new worktree.
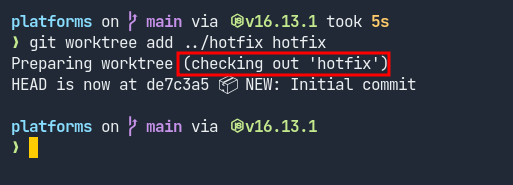
Note that instead of saying new branch '<branch>', this time it says checking out '<branch>'. Let's make some changes in the hotfix and feature-1 worktrees.

As you can see, you can maintain different "branches" of work simultaneously. From the worktrees, you can rebase, pull, push, etc. All the things you normally do from a branch.
So far we've been creating new worktrees off of the main branch. Let's create a worktree from the dev branch. To do that, simply checkout to the dev branch and create a worktree from there.
Here are some more useful commands for working with git worktree:
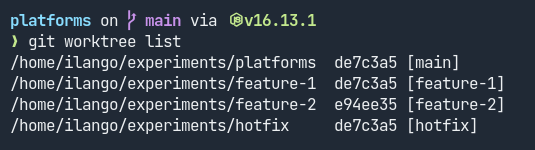
To list all worktrees:
git worktree list
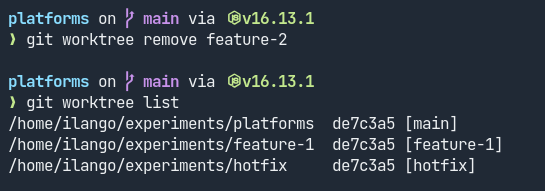
To remove a worktree:
git worktree remove feature-2
Note: If you have untracked files and/or changes in tracked files, git will refuse to remove the worktree. If you still want to remove it by force, you can do so with:
git worktree remove -f feature-2
There are a lot more options that are available for git worktrees on the git website.
Hopefully, you can see how powerful worktrees can be and how to use them for your own projects.
How I use git worktrees
Now that you've gotten familiar with git worktree, I'll explain a bit about how I use them. If you noticed, when I was creating a worktree (from an existing branch or new branch), I used the path ../<worktree>.
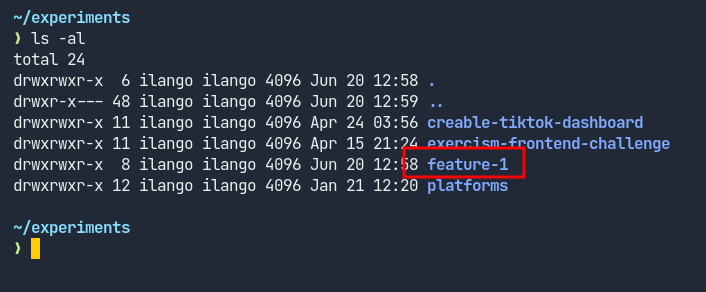
This means I'm telling git to create the worktree one level up from my repo root. Because obviously, we can't have our worktree inside our repo root. But this leads to a problem where my worktrees reside alongside my repo root.
Here's what I'm talking about:
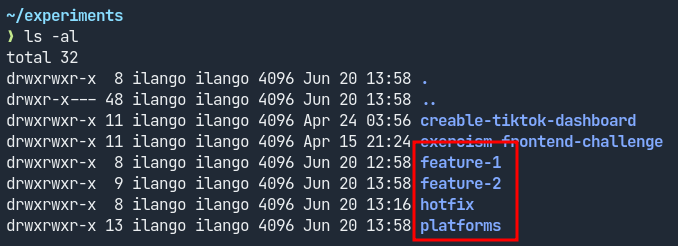
This can work but it's an organizational nightmare when you have a lot more worktrees, especially if you treat your worktrees like your branches (like, how often do you really delete your local git branches?).
To get around this, I use another git feature called bare repositories.
When you clone a repository, along with your project files, there's also a hidden .git directory in your repo root. This is where all the administrative folders and files git uses to do its operation reside.
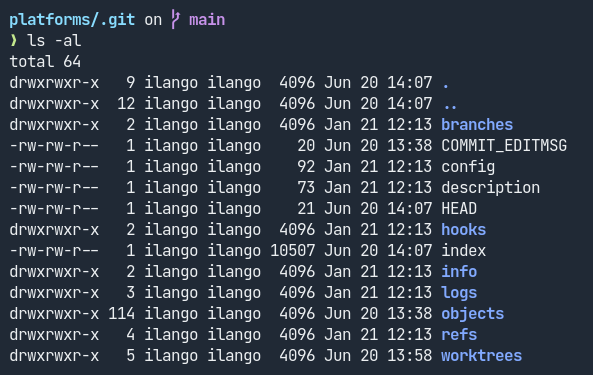
When I clone a repository to my local machine, I add the --bare flag to the clone command:
git clone --bare https://github.com/ilangorajagopal/platforms.git
This will clone the repository but will only clone whatever is in the .git folder. Also, cloning a bare repository doesn't automatically check out to the main branch because there's nothing to check out. This is because there are no project files or branches.
Why would I do this? Because bare repositories have better folder organization when you're using git worktrees.
After I clone a bare repository, I create a main worktree:
git worktree add main main
You don't have to do it but I like having a main worktree that's always available. This creates a worktree (and folder) inside my bare repo root.
Note that the path doesn't have the ../ part in them. This is because I want the worktree to reside inside my project root.
I can create as many worktrees as I want and they will all coexist inside my project root folder. So even if I end up with a ton of worktrees, it's all inside my project folder, neatly organized.
For example, here's the bare repository of one of my side projects, Aurelius:
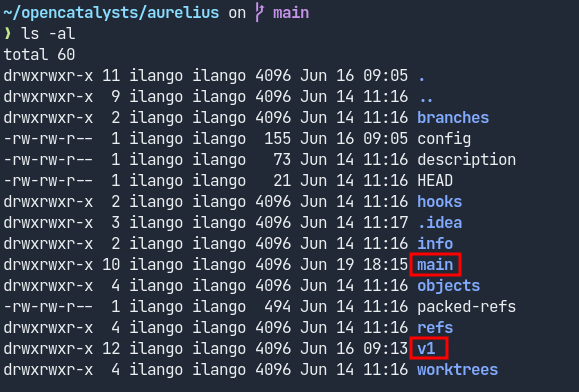
Notice the main and v1 folders? They're my worktrees and they're associated with branches of the same name. Now when I want to work in a worktree, I cd into the corresponding folder and start coding.
I only recently discovered git worktrees but they've completely changed my workflow and for the better. I can rest easy knowing that changes in a branch won't interfere with work in another branch.
There are still some kinks to work out in my current workflow, especially with my .env files. Right now, I've to manually copy them every time I create a worktree. I'll probably automate it soon enough. But this workflow is already better than the previous one.
Surprisingly, git worktrees are not a new feature. They've been in existence for years but haven't been widely known.
This turned out to be a longer post than I intended. Hopefully, you're as blown away as I was when I learned about git worktrees. It's such a powerful feature.


